EZ4U2 Headlight Restoration Kit Produces Professional Results Everytime
|
|
|
|
|
|
|
|
|
|
|
|
|
|
|
|
|
|
|
|
|
|
|
|
|
|
|
|
|
|
|
|
|
|
|
|
|
|
|
|
|
|
Headlight Restoration Service
Search by Keyword
EZ4U2 Headlight Restoration Kit 4 Simple Steps To Restore Your Foggy Headlights
|
|
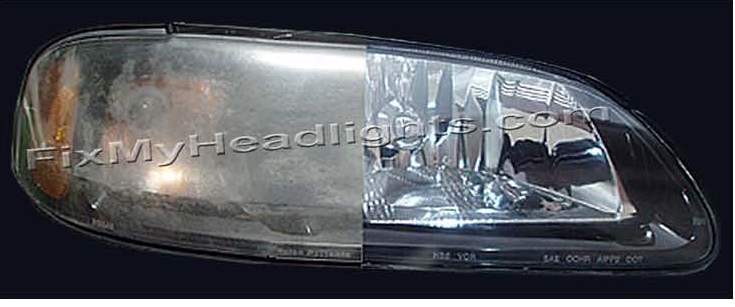
Wet-Sanding The Foggy Headlight Lenses
#400 / #1000 / #2000 wet sand paper enclosed in our headlight restoration kit. |
|
|
Use the headlight polish #2 and a white towel in our headlight restoration kit. |
|
|
This step removes any residual polish or grease that is on the headlight lenses. Also it prepares the lens to receive the sealant to form a strong bond. |
4 |
Now that your headlights are clean we can proceed to sealing them so they last a long time.
Note: Overlap passes by 50% this will allow you to maximize your sealant coverage. |
Comments
-
Ken Zorovich on May 16, 2011 at 11:08 AM said:I was skeptical of this product. I initially bought a product from Home Depot that was supposed to remove the haze and used a buffer to apply it. It did not work. I proceeded to price out new headlight casings for my Accord and my wife's CRV. That is very pricey. I found Abe and I am know a beleiver. I purchas4ed the kit and was able to do 2 cars in about 45 minutes. Very easy to do and very successful results. I strongly recommend this product to anyone.
-
on May 16, 2011 at 9:05 PM said:I want to say thank you to the people at Fixmyheadlights.com Because their headlight restoration kit works great. It is feels really good when you buy a product and it works. I tried another kit before and my headlights came out OK. They looked clean but with the kit from fixmyheadlights my headlights now look like NEW. I am so happy man I had to write this testimonial. If you are on the fence about buying this headlight restoration kit, I recomend you get it. Look at the video and read the instructions and your headlight will look like new.
customerservice@fixmyheadlights.com